
Business Management seemed like a safe bet when I first started college. Who knew that single decision would force me to learn how to become a web designer without a degree later in life.
If only in your late teens and early 20s could you have the foresight to pick what you would be doing with your life for the next 40+ years.
Sheesh, that seems like an impossible task. And, certainly not one I’m going to force my kids to try and make when they haven’t even exited the puberty stage of their lives.
Thankfully, we live in a day and age when information is readily available. And, if you REALLY WANT to learn anything about any topic, you can.
…want to start your own catering business from your kitchen? Easy
…want to build a candle making company from your garage? Done
…want to build a thriving web design business from your couch? You betcha
My Own Journey in Becoming a Web Designer Without a Degree
My own personal story to become a web designer without a degree started in my early 30’s.
My entire adult career had been spent making music. I was a worship pastor at a church in Phoenix, Arizona. The problem with that was, like most creative based professions, it didn’t make me a lot of money.
So, as my kids got older and I suddenly became a single dad, I had to figure out a way to make some money on the side in order to provide for my kiddos.
I’d done a little bit of graphic design work from the bands I was a part of AND I had gone through a few Codecademy classes for fun. So, web design seemed like the perfect new path for me.
So, when my kids were sleeping or I had a free moment at work I was working away either on a personal project OR a client’s.
Surprisingly, it wasn’t long before I was charging anywhere from $3k to $7k for a website and I realized I had a full fledged business.
I made a lot of mistakes along the way. Some, I’m too embarrassed to talk about and others I’ve blogged about openly.
Here are the 7 steps that I would tell someone who’s getting started today on how to become a web designer without a degree and get there fast.
Rather go through a free course to teach you how to become a web designer without a degree? Check this out:
STEP 1: Find a Client
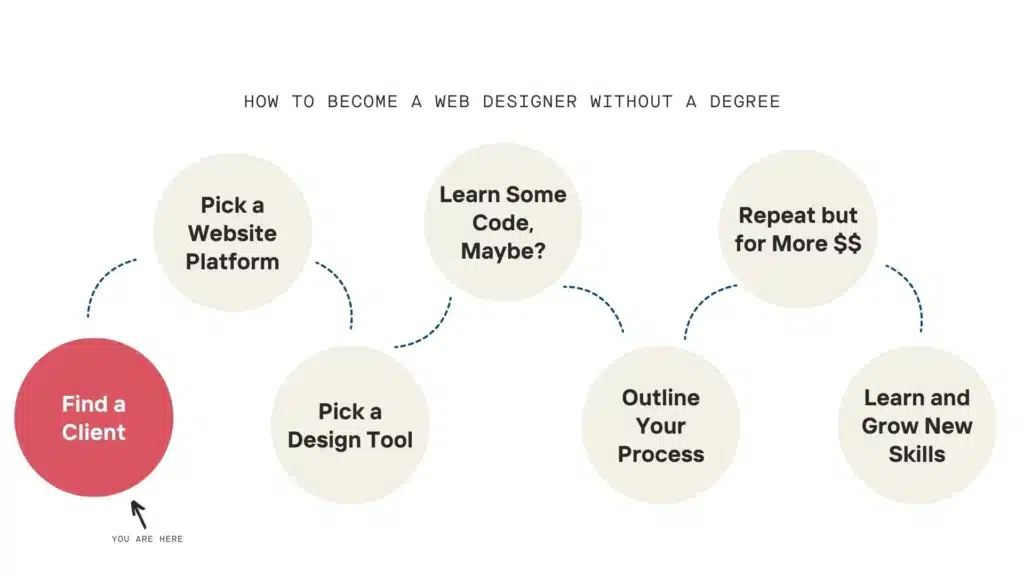
This may seem like the opposite of what feels like the right first move. But, your first step is to find a “client.”
I know, I know. Traditional wisdom tells you to lock yourself in a room and do a deep dive on all things design and/or development.
But, here’s what I’ve found to be true:
If you want to become a web designer without a degree, it’s best to have some external motivator that holds you accountable and keeps you going when you inevitably get to the place that you feel like quitting.
Learning any new skill or developing any new habit will be hard. No matter what it is.
With learning web design, there will come a point that you are pulling your hair out and everything inside of you will want to either throw your computer against the wall or curl up into a ball and cry…maybe both.
To avoid that, put some things in place that force you to stick with it even if you don’t want to.
I’M NOT SAYING go out and promise someone that you’ll build them some super complicated, state of the art, award winning website.
That’s just crazy.
Instead:
- Find someone that needs a website either a redesign or something completely new.
- Tell them you’re learning how to do just that
- Offer them a good deal if they’re willing to work with you
- Set really clear and very low expectations with them
The first step in finding a client when you’re trying to become a web designer without a degree is to talk to the people you already know.
People hire people because they trust them either to do a good job OR just because they trust them in general. You need someone to trust you for a reason outside of the skill that you don’t have yet.
Those folks tend to be people who already know you and are close to you.
So, write a list of 10 people that might need a website and are somehow connected to you. Reach out to them and ask if they need help.
If they don’t, ask them to mention you to anyone who might.
A Few Objections
Objection #1: What if I don’t know anyone that needs a website?
You probably do, you just don’t know it yet.
It reminds me of my first car. A good ole Isuzu P’up. I was sure that no one else in the world had a truck like mine.
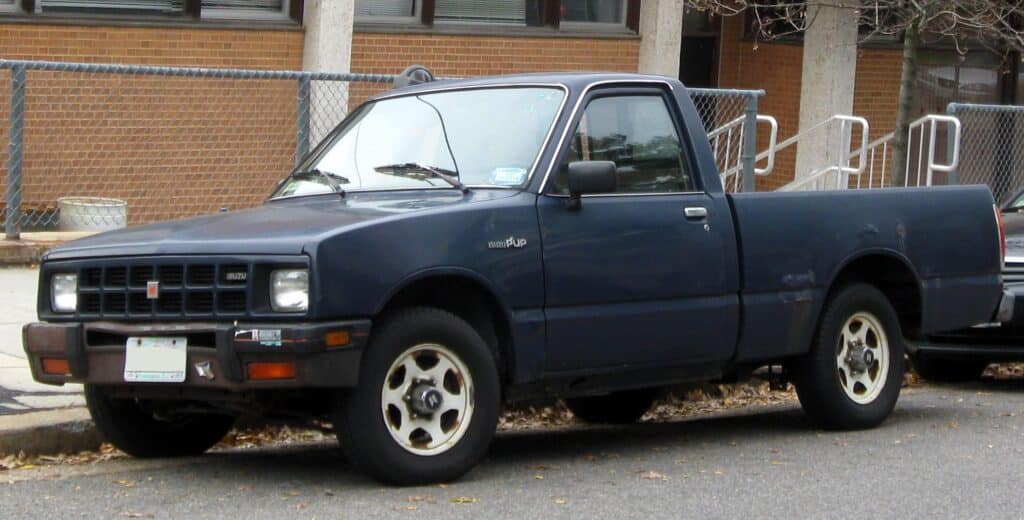
It was small, dorky and super slow, and I knew it was going to be the downfall of my social stature in my big Texas high school.
But, a weird thing happened. I started to notice the same truck I was driving on the road more than I ever had before.
Pretty soon, I was seeing them everywhere.
So, how did I go from never seeing any Isuzu P’ups to seeing them all over?
Simple, I started looking for them. It’s not that they weren’t there before. I just hadn’t trained my brain to trigger any time one of them was around.
So, there was this whole world of Isuzu P’ups around me that existed I just didn’t know it!
The same is true for people that need websites.
Of course, if you’ve never tried to build a website for someone before it will feel like the opportunity doesn’t exist. But, a weird thing happens.
Eventually, you start to notice things you never did as it relates to people’s business and their website. So, you start having conversations.
Those conversations lead to other conversations and eventually you find someone that is willing to work with you as you learn to become a web designer without a degree.
But, it all starts with having conversations with people you know about whether or not they might need a new website.
Objection #2: Why would anyone pay me if I have no experience?
I’ve found that people are willing to pay to not have to figure things out themselves.
So, as long as you’re open about where you’re at, there will likely be a lot of folks that are more than happy to pay you to figure out their website.
You likely won’t get $4000 for your first site. But if you do, hey, that’s awesome!
There will be some folks who prefer hiring someone with experience. But, a lot of folks I talk to don’t need a super complicated website.
In fact, I’ve heard people say the same thing over and over I can basically recite it from memory. It goes something like this:
“I don’t need anything fancy, just something that people can go to and see I’m a real business.”
All that being said, there is something you want to make sure you do: set really clear expectations with a really clear “this is what done looks like” conversation.
I would keep it to around 4 pages with a max of 5. This is something that you don’t want to take months to figure out.
So, settle on a home page, about page, contact page, maybe a services page and a final dealers choice.
BUT be careful here, if they have a lot of copy for every page or no copy at all, it could end up taking longer than anyone would ever hope for.
We’ll talk about strategies for getting things done even if clients are dragging their feet to get you what you need. But for now, just try to be as open as you can about what you’re doing and what you need from them.
STEP 2: Find a Website Building Platform You Like

In case you were wondering, no you aren’t going to code this website from scratch.
Learning html, css and JavaScript are a great thing to do. In fact, at some point you will likely have to get familiar with those coding languages. We’ll talk about that a bit later.
But, knowing code IS NOT NECESSARY to become a web designer without a degree.
In fact, I know many many web designers who don’t know the first thing about HTML and throw up a little in their mouth when you ask them to open up visual studio code editor.
Even though you won’t need to learn code to become a web designer without a degree, you will need to learn some type of website building platform.
Good news, there are a ton of great ones out there.
So, take some time and sign up for some platforms. Try to build a simple page. See if it makes sense or it’s taking you a ton of time to figure out.
My favorite is obviously, Showit.
Yes, I do work for Showit. BUT, yes I do believe it’s the best option out there. And, I’ve tried a lot.
In fact, before I started working for Showit I was building websites for clients myself. So, I can attest to the fact that a “drag and drop” website builder doesn’t always mean truly “drag and drop.”
But, the only way to know that is to sign up for some free trials and see what works best for you.
When you first log in to a website builder it might feel a little overwhelming. And, me just saying “sign up for a free trial and give it shot” might fill you with anxiety because how the heck are you supposed to even know what to look for and what to avoid?
No worries. I got you covered.
What to Look For in a Website Builder as a Beginner
Here are a few things that are must haves for a builder that will work well if you have no experience building websites.
1. Low technical knowledge requirement
You need a platform that won’t require you to have a pretty good knowledge of how things work behind the scenes of a website.
So, if there are platforms that you find a lot of people who identify as “techy” you know, it’s not for you.
You may ask, “don’t all website building platforms say they’re simple to use and don’t require any technical background?”
Very astute of you. The answer is yes.
The problem is that “no technical background required” can mean a lot of things including actually needing a decent amount of technical background.
So, find a platform that you can build a site without knowing a lot about HTML or CSS.
Oftentimes, you’ll be able to get a design about 80% of the way to what you want. But, to get it that extra 100% you’ll need some HTML and CSS.
A few other options to check out that are great are platforms like Wix and Framer.
2. A Good Amount of Templates to Choose From
The quickest way to become a web designer without a degree is to find a platform that has really good templates to start with.
It’s never a good idea to start out your journey as a web designer going from a blank canvas to a finished product you’re going to show your client.
That’s overwhelming even for folks who have been web designers for a while.
But, the cool thing is you get to jump the learning curve and save tons of time by borrowing from designs that other people have built with the express purpose of you taking that design and making it your own OR making it for your client.
Fortunately, with any major website building platform there will be a plethora of templates to use from.
Showit has free and paid templates as does Framer or Wix.
3. The Ability to Scale Up
Inevitably, you’ll want to be able to do more and more things with your website builder as you grow in your web design skills.
So, you don’t want to choose a website building platform that doesn’t allow you to expand as your capabilities do.
There are a lot of website building platforms out there that are super simple BUT simplicity is their only selling point. Take Google Sites.
It’s free. It’s simple BUT it’s super limiting.
I’ve found that the businesses that are more drawn to those types of websites are going to build their own websites any ways.
So, start with a platform that gives you room to grow rather than invest time and energy into a platform you and your clients will outgrow quickly.
Typically, those platforms will have the ability to add more and more functionality whenever you’re ready.
AND, the main types of functionality that I’ve seen clients want to add as their business grows are:
- eCommerce – the ability to sell products or services
- Newsletter sign-ups – the ability for users to add their email to the clients list
- Membership portals – the ability for people to login to a website and access functionality or information that isn’t available to non-members
Of course, there’s SO much more that a business “might” want to do with their website. But, if you find a platform that you can at least do those 3 things, then for the most part you’re golden.
The good news is that you’ll be able to do all those three things AND more with any platform that integrates with WordPress.
No, I’m not talking about WordPress.com. With WordPress.com, you have to login via WordPress and then you’re basically stuck using whatever tools WordPress gives you.
Not a horrible option. BUT, with WordPress.org you have access to all sorts of plugins made by all sorts of developers that allows you to do all sorts of things.
I know this might be confusing BUT basically you want the option that you’re not paying WordPress for what you’re using.
With WordPress.org you can add on functionality as time goes on AND it gives you the option to choose what works best for you or your client.
You can do all of the three things I mentioned (eCommerce, Newsletter, Membership) with a platform like Wix, but you’ll have to use their tools. They don’t make it as easy to use third-party options.
And for a lot of clients, that’s totally fine! It all just depends on how you want to approach things.
With WordPress.org, you have a ton of options to choose from BUT it will likely take some time to learn how to use those options. And, as you get more and more advanced in what you’re doing for clients, you might have to learn some code.
With platforms like Wix or SquareSpace, you don’t have as many options BUT everything stays in house. So, it might not be as much effort to learn how to do all those other things.
I’ve always liked the ability to use what works best AND I’ve always been fairly confident in my ability to figure things out if they get technical. So, platforms that integrate with WordPress.org have always been the best option for me.
Thankfully, Showit integrates with WordPress. So, it works well with how I build websites for clients.
4. One You Like Using
Now for the part of the equation that only makes sense for you.
Every website builder has a unique way of doing things. Sure, most of the good ones follow some common patterns that you’ll be able to notice more and more the more familiar you get with a lot of different builders.
BUT, it’s possible that one will just “make more sense” to you than others.
What that probably means is there are some UX (user experience) patterns that you’ve learned from other things you’ve used. And, because you already have familiarity with those patterns that particular builder will just make more sense.
And, that’s great! You don’t even have to justify it. Just go with the one you feel more comfortable with.
At the end of the day, most of the popular builders out there will work just fine. Yes, I love Showit. But, I also know it’s not right for everyone.
So, you should be good to go as long as you feel comfortable and it ticks all the other boxes.
STEP 3: Pick a Design Tool
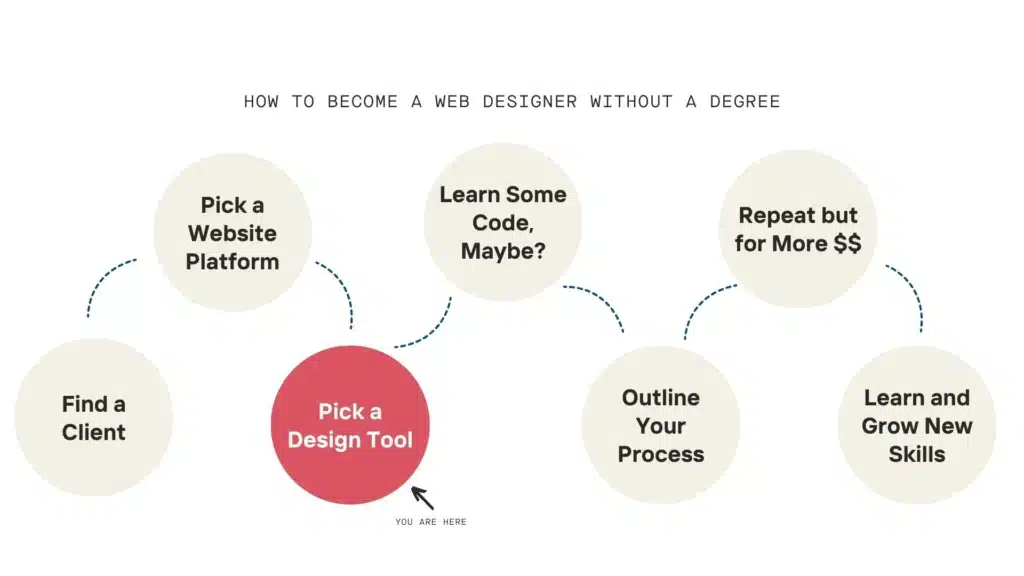
If you want to become a without a degree you’re gonna need to know how to navigate a design tool.
You might say, “But I thought that my design tool was the website building platform!”
Yes and no.
Web building platforms have come along way BUT there aren’t any that allow you to manipulate photos or vectors like you’re probably going to need whenever you’re building a website for a client.
At minimum you’ll need to take REALLY BIG photos from clients and make them smaller so they don’t take as long to load on a website.
BUT, probably, you’ll have to create some vector elements like icons and/or get creative with some images. Who doesn’t love a nice line that looks hand drawn OR an image disappearing behind some clouds?
A lot of that stuff is made outside of the website builder and then uploaded afterwards.
So, what are your options? It goes from easy but not super powerful down to more complicated but super powerful.
OPTION 1: Canva
Canva is a free option, and it’s about as simple as it comes. They’ve done a great job making design accessible to all folks whether or they know a thing about the Golden Ratio or not.
You should be able to log in and make some basics designs fairly quickly. Then you can easily export to any image type you might need.
The only problem with canva is that you kind of get what you get. So, you’re gonna have a tough time if you ever want to make something outside of the templates they give you.
You could for sure get by with just using canva for a lot of projects especially the simple ones you do early on. But, eventually you might feel limited.
Canva has a free account BUT if you want access to all their assets you’ll have to pay a little.
OPTION 2: Figma
Figma is another free option AND the complexity steps up quite a bit here.
The main purpose of Figma is for teams to build product based web designs. Think mobile or web apps. But, it’s also a great tool for designing websites.
There are some options to create and manipulate vectors but from personal experience if you ever get to the level that you’re using figma you’ll probably STILL need to work a bit in Photoshop and/or Illustrator.
You just have much more control over what you can do with Adobe. But, I find myself splitting my time more and more between Adobe products and Figma.
OPTION 3: Adobe Suite
Finally, we’ve got the flagship, Adobe. There really isn’t anything out there like it.
You can just do so much with Photoshop and Illustrator. But, it takes a while to learn.
Now, hear me out. I’m hardly ever making something from scratch in Photoshop or Illustrator. More often I’m taking a template I found online and customizing it.
But, learning how to customize things even takes time. It’s well worth the time investment if you’re asking me BUT just realize you’ll be frustrated at first.
This isn’t a free option. So, it might be worth it to wait until your web design business has some cash flow.
STEP 4: Learn Some Code…Maybe?
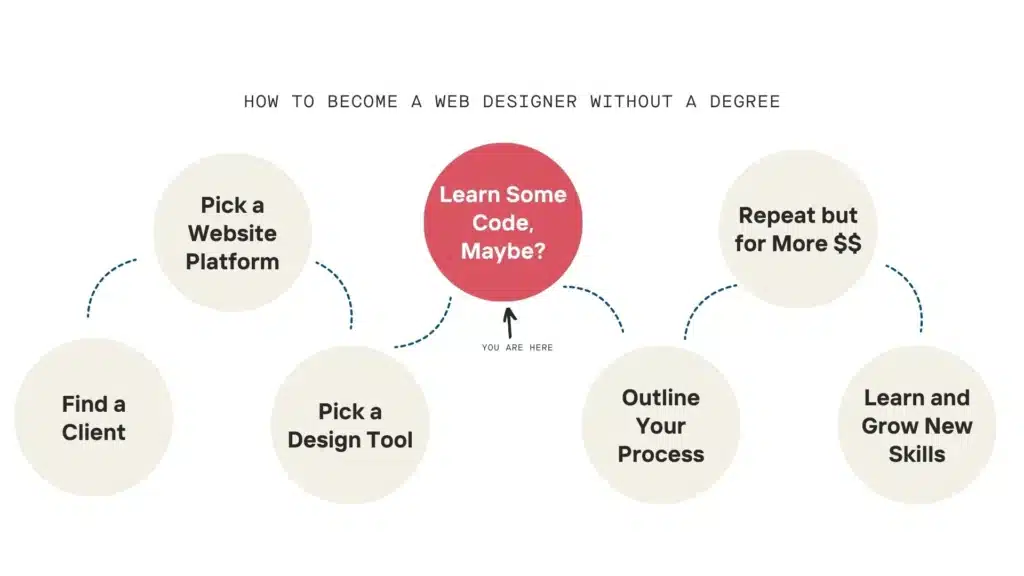
I know I said you won’t have to learn code to become a web designer without a degree AND I STAND BY THAT, BUT I think it’s at least worth learning the basics in case you ever need it. You will at minimal feel limited if you don’t know how to do some CSS.
My favorite go to learning platform for code is Codecademy. It’s where I got started AND there’s all sorts of fun learning routes you can take.
From there, if you want to dive into user based interactions like animations you could learn JavaScript OR if you feel like WordPress is you’re jam you could get some PHP under your belt.
It’s likely that 85% of what you’ll do for clients won’t need code at all. For the other 15% you could either farm it out to a developer OR you could just choose not to take on those products.
I’ve loved being a designer who knows his way around code. It’s opened up a lot of opportunities AND I just like developing stuff.
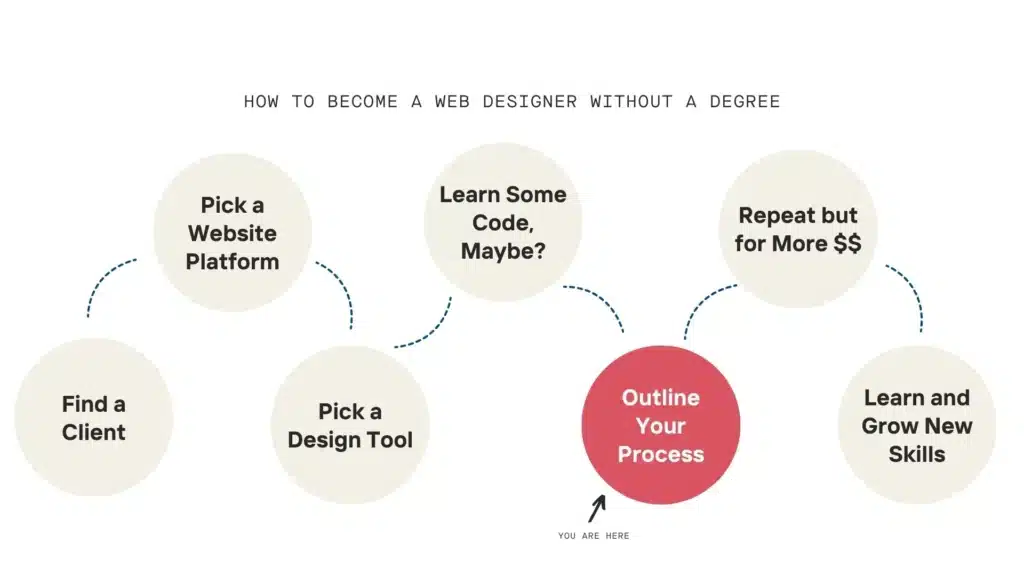
STEP 5: Outline Your Client Process
If you don’t want to read the next 1,000+ words, here’s a video that outlines the importance of establishing a client process:
Okay, you’ve got a client. You’ve picked a website builder. Picked a design tool AND learned the basics of HTML AND CSS.
The next step to become a web designer without a degree is to build a process that you’re going to take your clients through.
You might want to jump the gun here and just start building the website but hear me: you will save you and your client SOOOO much trouble if you outline a workflow that makes everything easier on you and the client.
Ultimately, your goal with this first project is to do a good enough job that they can’t help but tell their friends about you.
And, one thing that will most definitely set you a part from even other web designers that have been doing this for a while is having systems in place that stair step the project to completion.
The truth about creative projects is that you never go from absolutely nothing to some masterpiece.
Think about how a novel is created? Writers will develop characters. They’ll do research. They’ll create an outline. Then they’ll go from chapter to chapter until it’s finished.
But, for some reason, when it comes to websites, people think they should be able to have a bit of brainstorming session and know exactly how the final site should look. Nope. That’s just not how it works.
So, here’s a general outline of a client process that will help you become a web designer without a degree.
1. The Kick-Off Call
Every good website project starts with a good conversation. Ask your client to set aside about 30 to 45 minutes to talk about their new or redesigned website.
You want to get as much information as you can AND you want to make sure to record it somehow. I can’t tell you how often I’ve chatted with a client, felt good about everything then completely forget everything they said 🤦🏼♂️
I tend to chat with clients over zoom and then just record the conversation so I can come back to it if I forget or have questions.
This being your first time will likely have no idea what to ask. No worries. I got you. Here are the questions you’ll need to cover before you get off the call.
FIRST QUESTION: What does your new website need to have?
You’re looking for as much information as you can get about what all the client is hoping to have on their new website.
I like to leave questions a little open-ended. The goal is just to get the client talking. AND, open-ended questions tend to do that better than “what pages would you like on your new website.”
Now, if they start talking and don’t end up telling you what pages they’d like on their new website you’ll have to get that from them.
So, here are a few essentials you want to make sure you have before you move onto the next question:
- What pages will your new website need?
- What functionality does the new website need to have? (email, social media links, eCommerce…that last one is maybe not a good candidate for a first website BUT if you’re up for it DO IT!)
- Where is your old website hosted?
- Where is your domain name registered? (go daddy, blue host, name cheap, etc.)
SECOND QUESTION: Can you give me three examples of other websites you like and tell me why you like them?
You want to try and get a feel for the type of style your client is going for on their new website.
Here’s the tricky part about this: people don’t really know how to communicate what they want design wise.
I can almost guarantee you that they will say something like: “I’m just looking for something simple, modern and clean.”
Great, that describes about 85% of the internet.
You want to try and dig and get them to talk about things they don’t like. So, when they say, “I like this website.” You need to follow up by going through the website with them and say, “Tell me what you like about this section.”
Try to go through as much of the sites they mention as you can to try and get a good feel. This, unfortunately, is one of those things that just takes time and practice to get a good sense for what someone is looking for.
If you want to become a web designer without a degree you’re just going to have to pay your dues until you start to understand what people are saying without them really saying it.
THIRD QUESTION: Do you have any templates in mind?
Remember, we’re not building this site from scratch. We’re customizing a template. That’s the best and quickest way to become a web designer without a degree.
Think about it. You never start learning to play guitar by sitting down and writing a song on an acoustic.
No! You learn “Mary Had a Little Lamb.” Then you move on to harder and harder music.
The same is true for web design. It’s always best to start with someone else’s work and learn as you go. Then, after a while, you’ll have plenty of your own ideas that you can build off of for a fully custom site if you want.
BUT, trust me. There are plenty of professional web designers that ONLY customize website templates. They don’t build anything from scratch and they get paid very well.
Then the question becomes, “How do I pick OR HELP MY CLIENT pick the right template?”
Great question. Here are a few things you want to look for in a quality template.
1. A Good Template Gives You Lots of Options
It’s always a good idea to look for a template that gives you a bunch of options when it comes to what you can pick to use.
I like using templates that even have multiple versions of home pages or about pages. That way you’ve got the ability to pick what works best for you or the client.
2. A Good Template Gets You 80% of the Way There
I often hear from designers that a lot of times what started as a template customization project turned into basically a complete custom design.
There could be a lot of reasons for that. But, the main thing you want to be sure is that the template lines up with the brand, imagery, fonts and colors the client already has in place.
For instance, if your client likes bright bold colors and you pick a template that looks like it was inspired by the desert, you’re gonna be a little bit frustrated.
One of the best things to do is bring the client in on the decision purchase. Ask them to help you pick it. Ask them what they like about the templates they’re leaning towards. Ask them what they don’t like.
Be as curious as you can so that you’re not wasting your time picking a template but then ultimately restarting because it just doesn’t work.
This is also something you want to make sure you’re communicating. They need to know that you can make changes regarding fonts, color, copy and images but everything else will likely stay pretty close to the template.
That will help them make a more informed decision about which template they choose.
3. A Good Template Is One That Makes You Excited
Some templates are great, they just might not spark that excitement in you like others.
Yes, of course you’re serving your client. BUT, if you just hate working on a template it’s going to be pretty tough to actually get the project to the finish line.
So, make a little extra effort to find a template that YOU LIKE and your client likes as well.
One way to do that is make sure you don’t present a template to a client that you don’t love.
When I first got started, one mistake I would make is sending 3 options for templates to my clients.
There’d always be one I was really hopeful they’d pick, one that was a safe bet and one that I didn’t love but thought the client might like.
Inevitably, the client always went with the one I didn’t love.
The fun thing with building websites for clients is that you get to control the narrative. They won’t know a template exists unless you tell them it does.
So, leave out the ones that don’t get you excited.
FOURTH QUESTION: Do you have copy, brand assets and images for your new website?
This one is essential. If they don’t have anything it’s going to make things much more difficult. All is not lost without this stuff BUT you’ll need to do a lot more work in order to finish the site.
So, it might be worth asking them for a little bit of extra money if they don’t. If that’s not possible you still might want to finish the project. You’re not looking to make a ton of money on this first one. And, it might be worth it to jump start your career as a web designer.
If they do great. If not, you’ll need to work that out with them.
Thankfully, there are some great places to find brand assets and images AND Chat GPT does a decent job on the copy.
For stock photos, my go to is Unsplash. They’ve got all sorts of photos from different photographers that will fit most needs.
For brand assets, I like to use Envato Elements. This is subscription based and has tons of different types of assets to use for any creative project. There’s everything from Photoshop actions to logos you can customize for your client.
There are also tons of options for which design tools like Figma or Adobe you can edit with. It’s a great resource.
A word of caution on copy. It will take 2 to 3 times as long to finish if a page has more than 1,000 words. That doesn’t mean it’s something to walk away because of BUT it might be something to consider.
FIFTH QESTION: What does your ideal timeline look like?
Okay, the final question you want to make sure you cover is around timeline for the client. AKA how long are they hoping it takes for this project to be finished.
Notice I didn’t say, “how long it takes you.” Building a website with a client is very much a group effort. the client will need to get you information and assets. Sometimes, you’ll need to go back and forth to find the right solution.
Why do we ask this if WE DON’T EVEN KNOW HOW LONG IT’S GOING TO TAKE US?
Because we want to make sure we’re setting up proper expectations with our client.
You might be thinking that we don’t need to worry about expectations because after all we’re giving them a good deal and they knew what they were getting into when they said yes.
But, here’s the thing, you need to treat this as if it was a legitimate project.
Building the website for your mom? Treat her like a client you’ve never met before.
Building it for free? Treat it like this is the highest paying gig you’ve ever gotten before.
It’s so important to develop good habits AND have a good perspective early on in order to create good rhythms as you grow to become a web designer without a degree.
So, figure out what their expectations are. You’ve got a couple options if during the conversation you realize that their expectations aren’t realistic.
- You can try to help them understand that their timeline might be unachievable. After all, you’re learning and you’re not 100% how this is going to go BUT you know you’re going to work hard to get it done as quickly as possible.
- Walk away and encourage them to find someone with more experience that might be able to offer a better timeline than you can.
You’ve got nothing to lose here. You will definitely be able to find another project if this doesn’t end up working out.
It’s better to make sure everyone that’s invested in the project has an understanding of just what is AND isn’t possible.
Alright! Now that you’ve gotten through those questions with your client it’s time to let them know what the rest of the process looks like. So, here’s how it’s all gonna span out AND what you can communicate to them.
2. Sitemaps and Wireframes
The next step in the process is creating really lofi versions of the website. Lofi meaning low fidelity meaning there’s not a lot of detail to what you’re doing.
The purpose of this is to create something that doesn’t take you a lot of time and the client can sign off on before you move to the more detailed web design.
You never what to get off the client call, go into the proverbial basement and then show up weeks later with a finished project. That’s the quickest route to a lot of wasted time.
Sometimes it’s tough to tell what the client really wants. Think of it like an excavation.
You don’t show up to the dig site and bust out the excavator. You’ll end up damaging everything you’re trying to unearth. No, you take out the brushes maybe some small picks and you start chipping away at what you think is underneath.
That’s what you want to do with your client’s website. Take small baby steps until the big picture becomes clear. Then let the excavator do it’s job.
The first step is with a sitemap and wireframes.
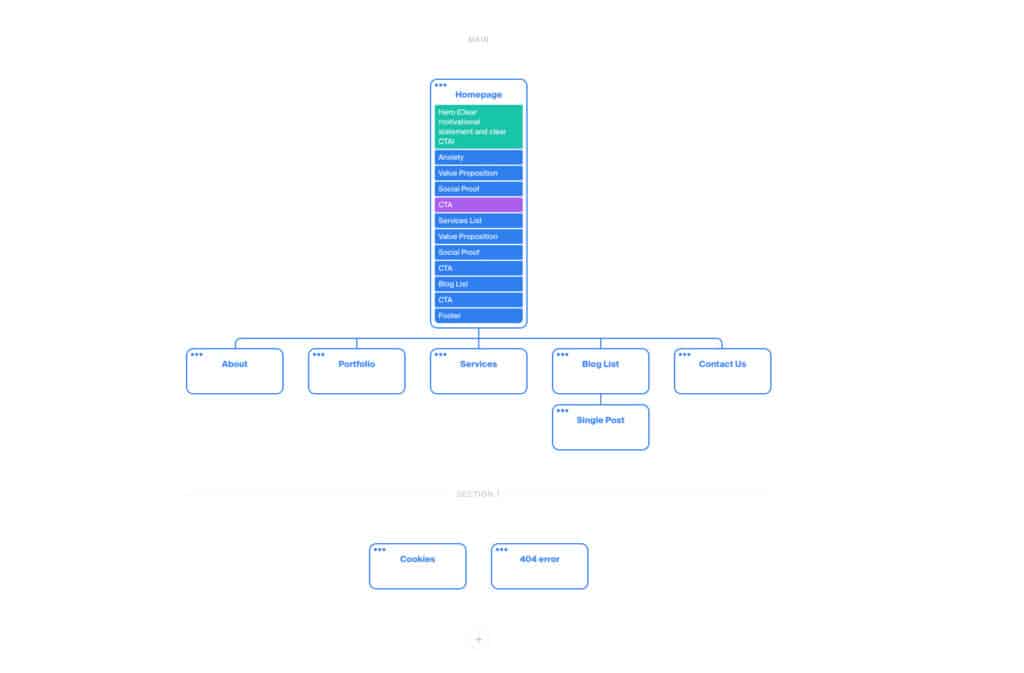
A sitemap is all the pages of the website laid out with all of their connections between pages. This helps to ensure a good flow between pages.
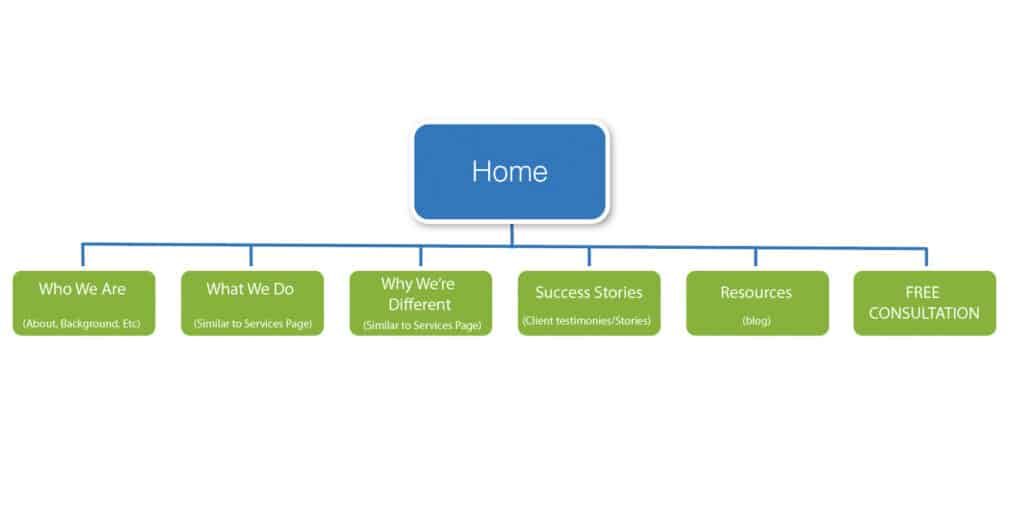
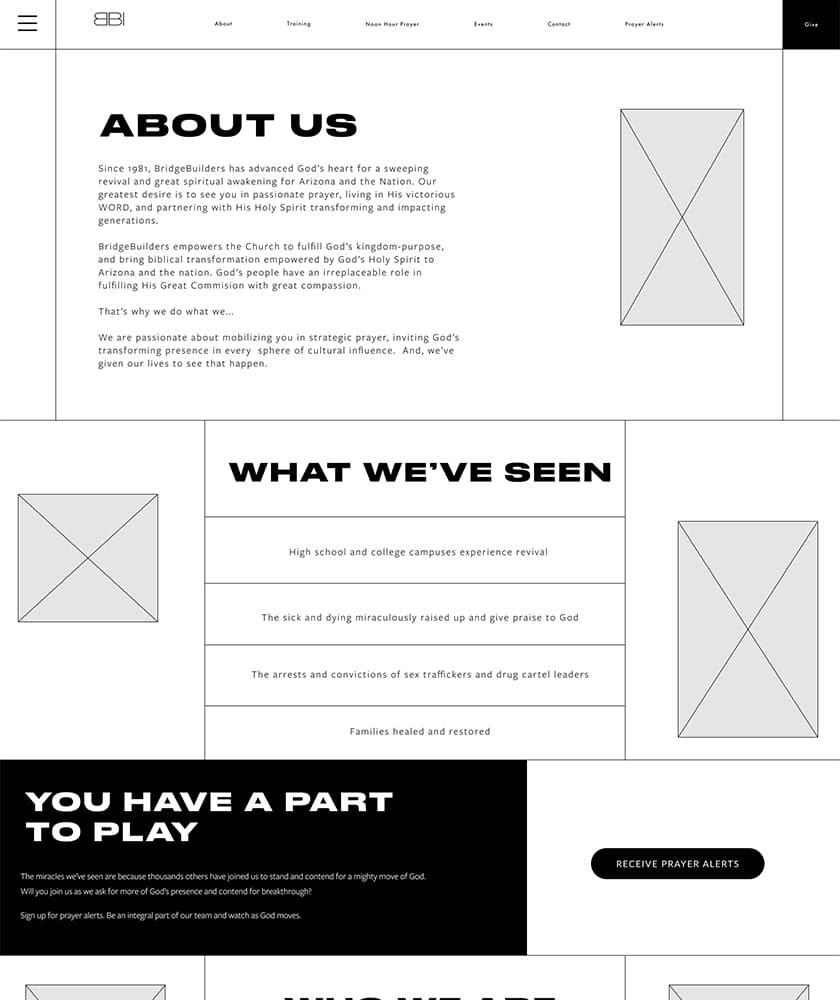
Don’t try to be too fancy! That was literally a sitemap I did for one of my first clients.
A wireframe dives a little bit deeper into what each of those pages look like. Some people get pretty detailed on wireframes. That’s what I did in the past.
But, what I’ve found is that the more detailed you get early on the less flexibility you have as things progress. It’s possible that a client will get attached to something you show them BUT when you get down into the nitty gritty it doesn’t work the way you hoped it would.
So, now I just keep things REALLY SIMPLE. I use a product called Octopus. There I create all of my sitemaps and wireframes in one.
For the wireframes, I just outline the content of each section of a page. I don’t do anything with layout.
That way I have full flexibility as things progress.
After you get the sign off from the client on the sitemap and wireframes it’s time to move to the homepage.
3. Homepage
I like to reserve an entire section of my process to building a homepage. The homepage takes the longest to build and will set the pace for the rest of the site. So, it’s kind of all downhill once the client is on board.
And, you’ll likely take different sections from the homepage and reuse them on other pages.
It’s time to move on to your first round of revisions once you feel pretty good about your home page.
4. Homepage Revisions
Here’s where things can go way south. If there’s anything If there’s one thing you will easily learn the hard way as you become a web designer without a degree it’s the revision process.
You’ll end up in web design purgatory if you’re not careful.
The key is to make sure you talk about what the revision process is going to look like FROM THE VERY BEGINNING.
Any time I work with a client, I give them 2 rounds of revisions for every part in my process that needs them.
So, specifically, that’s 2 rounds for the homepage and 2 rounds for everything else.
For each round of revisions they have 3 days to submit revision requests and then the door is closed. That keeps people from going back weeks after you thought you were done asking for one more change.
They get another chance to make revision requests once I make the changes from round 1. 3 days after that the door closes again and whatever gets changed is the final product.
I charge them extra if they want any more revisions after that.
Now, you might want to be a little more lenient your first time around. After all, you actually don’t know what you’re doing. BUT, putting these principles into practice early is a great way for you to learn how to handle scenarios like these with clients.
AND, make sure you have a live call with the client to discuss the design decisions you made. In other words, don’t just send them an email and say, “Here you go! Let me know what you think.”
I’ve literally shown a client the same page once on an email and another time on a zoom call. Guess which one they were more impressed with. I’m sure you guessed correctly from the tone in my writing. It was the zoom call.
There’s just something about being able to explain why you did something that can make the difference in someone like it or not. AND, it also gives you the chance to hear from them on why they like it or not.
Some times it’s just much easier to get than when you’re talking to someone rather than reading something they’ve written.
But, don’t leave it to the zoom call alone. Make sure you’re getting something in writing from them about what they’d like to see changed.
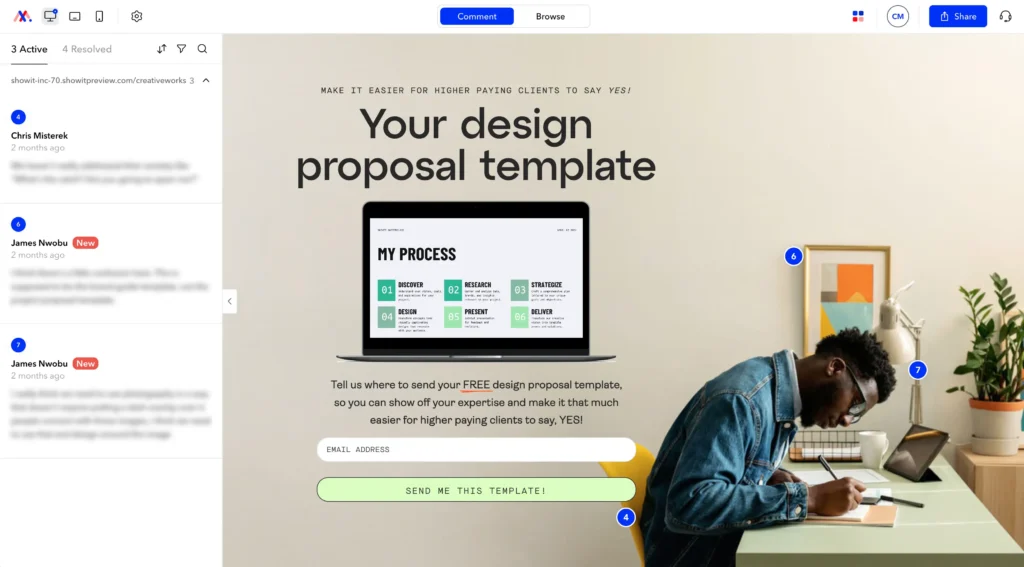
I use a platform called Markup to get client feedback. This allows them to go right to the page and add notes in places they’d like to see changes.
This helps me avoid back and forth emails with what could be 20 to 30 revision requests that have a big chance of getting lost in the tiny text of an email.
You may think that by only giving them 3 days to add revision requests you’re being a bit too stringent. BUT, what I’ve seen happen again and again is clients wait until the very last minute to get you what you need.
So, if you give them a week, it will take them a week. If you give them three days it will take three days.
It’s basic human nature. We all do it. It’s the lesson we learned from Parkinson’s Law: the time required to complete a task expands according to the amount of time we allot it.
So, don’t give them to much time to get revisions back to you OR from my personal experience they might end up taking a month or more.
5. All Other Pages
Alright, so, you made it through the homepage revisions process NOW it’s time to finish up the rest of the website.
Don’t feel the need to recreate the wheel on every single page. In fact, you will likely take a lot of the sections you made for the homepage and use them everywhere else, just with different text and imagery.
6. Ancillary Pages Revisions
It’s time to do another zoom call to present them the rest of the pages once you’re all finished.
This will work exactly like the homepage revision process did.
- You’ll jump on a call and explain your design decisions
- Get their initial feedback while recording the zoom call
- Give them 3 days to write up revision requests on Markup
- Finish those requests
- Hit it again with round 2 of revisions
By now you’re a pro, right?
7. Pre-Launch Prep
You want to make sure that you spend some time getting ready to launch ESPECIALLY if they already have an existing site that’s live.
This is another thing that bit me in the butt when I was learning to become a web designer without a degree.
There were a few times that I launched a site without backing things up OR writing down what some of the old settings were before I started changing things.
It didn’t take long to learn that I needed to do a little prep work before we launched.
First you want to make sure that you’re keeping records of the old site if they have one.
Launching a new designed website can cause a lot of issues with SEO if you’re not careful. If the URLs get changed you could have a lot of broken links which will reflect poorly on the new site.
For that I use a tool called Screaming Frog SEO Spider.
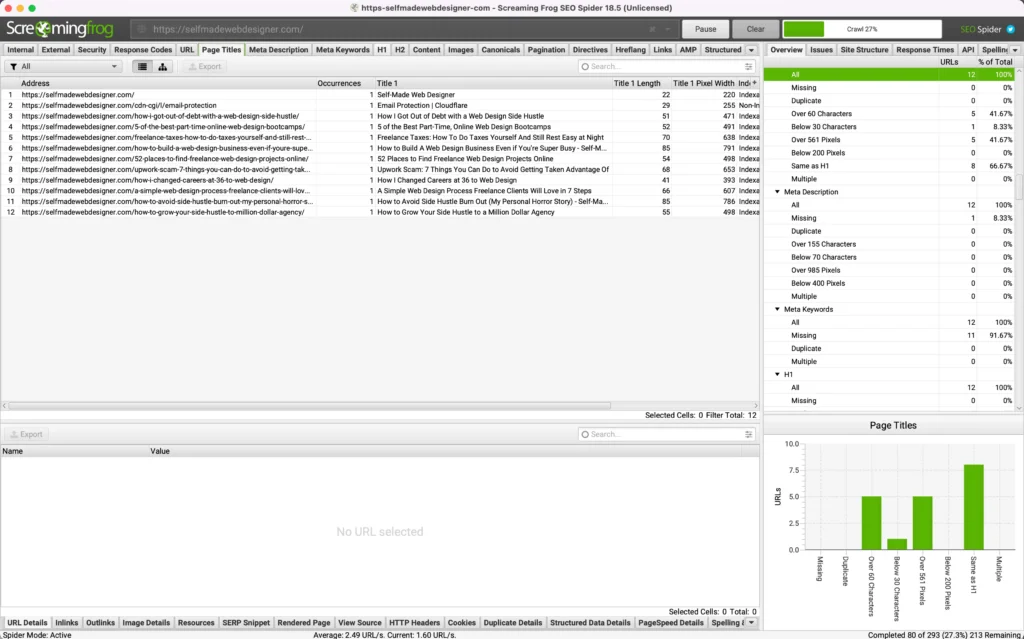
This tool will crawl every page on a website up to 500 pages before you have to pay. Then you can export each of the reports to keep for when the switch takes place.
That way if something happens like their traffic tanks then you can use the reports to try and figure out what happened.
More than likely something like that will be from broken links and a drastic change in content.
You also want to make sure you have all the necessary login information for domain registrars or hosting platforms if you need it.
In general, just make sure you’re keeping track of any of the settings inside their hosting or with their domain. That stuff gets complicated. So, take screenshots just in case.
And, always make sure everything is backed up.
8. Launch Baby!
You’ve done the work now it’s time to put your work out into the world.
If you’ve made it this far in the blog you’ve probably realized it takes a decent amount of work to become a web designer without a degree.
BUT, there’s nothing like the feeling of taking a website that was out of date and making something fresh and new for a client.
OR building a website that was nonexistent before you got your hands on it.
Launching a site or changing where a URL is pointing to can be pretty complicated. But, there’s really no way to learn outside of getting in there and figuring it out.
So, be careful and make sure you take records of old DNS settings but you’ll be able to figure it out easily after you’ve done it a few times.
9. Client Follow-Up
You launched the site and you now, hopefully, have a happy client. But, your jobs not done.
You want to follow up with your client BOTH to tell them you appreciate the opportunity to work with them BUT also to ask for referrals and testimonies.
At minimum, I like to send a thank you card to my clients. You’d be so surprised at the responses I’ve gotten from a simple thank you card.
It can mean a lot!
But, it also sets you up to ask them to do you a solid and give you some referrals and/or a testimony.
That may feel weird BUT you’ve got to get comfortable with asking people things that might make you uncomfortable if you want to become a web designer without a degree.
Trust me, it feels much more awkward for you than it does them.
But, the whole point of this first project is to get another project. You want to do a good enough job that when people see what you’ve done and hear from your client they’ll be convinced to hire you for their project.
STEP 6: Find More Clients BUT Increase Your Price
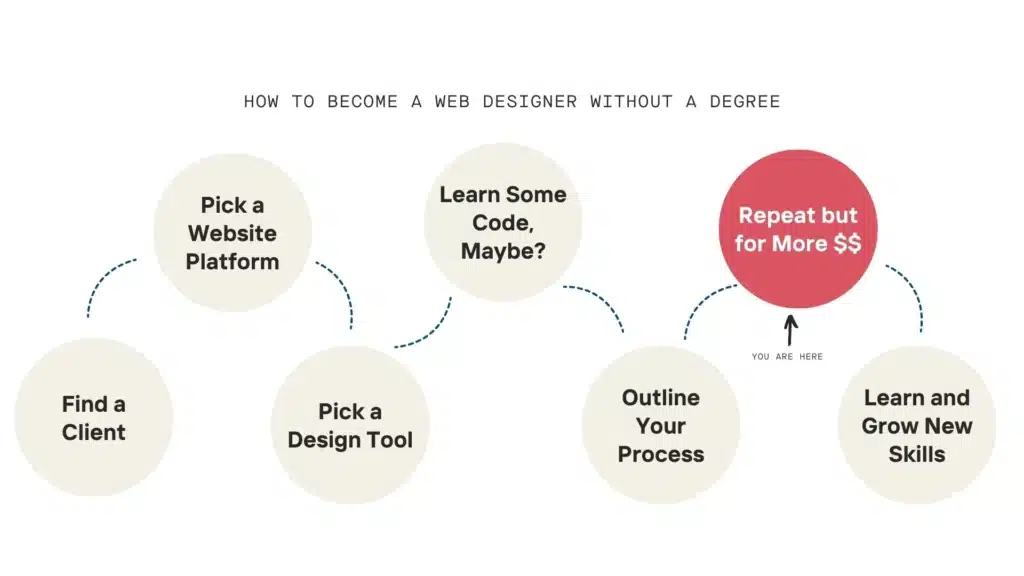
If you don’t want to read the next 1,000+ words, here’s a video that outlines how to scale up your pricing as a web designer:
You’ve got your first website under your belt!
Now you’ve got much more credibility with your next clients. So, each project that follows will feel less and less like someone’s doing you a favor.
Your pricing strategy as you become a web designer without a degree should be to incrementally increase the cost of each project with every new client you get.
What will start happening is you’ll get inquiries from potential clients as you’re working on another project.
So, when that happens just increase your price every time. The new potential client won’t know you just did another project for less.
AND, it won’t matter if they say no because you’ve got a project you’re working on right in front of you.
It might be a little nerve wracking to increase your prices so quickly BUT from my experience people will still hire you.
You don’t need to lie about your experience. People are much more concerned with whether or not you will actually do what you say you’re going to do than whether or not you’ve got X number of years under your belt.
You’d be surprised how often I hear stories of web designers who ghost there clients after a week or two of working with someone.
So, if you’re a half decent human being you’re ahead of most of your competition.
Eventually, you’ll increase your price to the point that people will stop hiring you. That’s when you know you’ve hit your price ceiling for this season of your business.
You might not stall out there forever BUT it’s a sign it’s time to either market yourself better OR grow some more skills.
Which leads us to our next and final step.
STEP 7: Keep Growing Your Skills and Improving
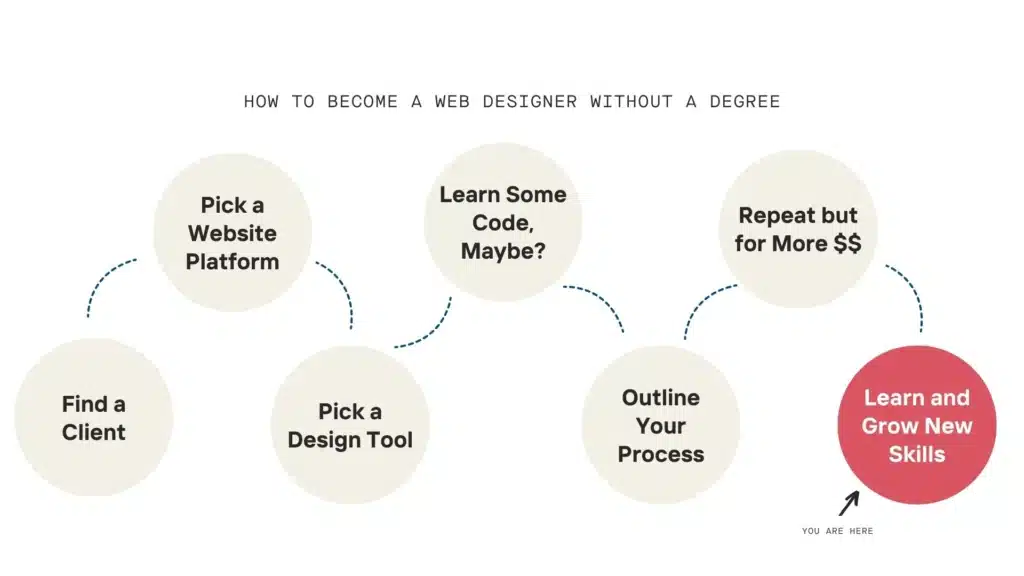
Look at every project as a chance to get a little bit better.
No, you won’t be an expert level web designer within a few short months of starting. BUT, don’t let that stop you.
You won’t become a web designer without a degree at all unless you’re willing to be bad at something for a little bit and make incremental improvements along the way.
Maybe you started manipulating photos by using Canva for your first project. Take some of the money you made. Sign up for Adobe and start learning how to navigate through Photoshop and Illustrator for your next project
Or maybe next time, take on an eCommerce website.
Inevitably, with each project you’ll run into something that is a little outside of your depth. Don’t shy away from that! Use it as an opportunity to learn.
Do you want to try and build an app for your very first project with a client? Probably not. That’s going to take a while to learn the coding skills you need to make it happen.
Your goal should be to feel slightly uncomfortable with every project you take on. That way it pushes you to grow but doesn’t overwhelm you to the point of having to walk away or do a poor job.
How Long is This Going to Take?
I often times get asked about just how long it takes a person to go from knowing basically nothing about web development and/or design to become a web designer without a degree.
The answer is IT DEPENDS.
It depends on how much spare time you have and how much time in your day you’re willing to give it.
Personally, I did have a little bit of experience working with design tools like Adobe when I started, BUT I began learning to code in August and by March I had finished my first client’s website.
That first client site took me about 3 months to finish. It was for the most part uncharted territory AND in my defense I was going through a divorce at the same time 🤷🏼♂️
So, some days I could spend a few hours working on their site and others I couldn’t do anything at all.
That’s why it’s important to find someone that’s willing to work with you. You never really know how long it’ll take you until you’ve got quite a few projects under your belt.
It took me 8 months with very limited free time in my schedule. So, if you have more free time it might take you less OR if you just catch on to things quicker than I do.
Your pace will really depend on you. The important thing is that you just stick with it!
It’s Not Easy to Become a Web Designer Without a Degree BUT It’s Worth It
Make no doubt about it, It will be tough to become a web designer without a degree.
There will be times that you’re working on a website where you feel like pulling your hair out or throwing your computer at the wall.
Just know we’ve all been there. Even the folks that got the degree 😂
What sets apart the people that make it all the way to the finish line and those that don’t is not some sort of special talent or skill set.
It’s simply the ones that decided they weren’t going to give up.
There will be plenty of chances to throw in the towel. But, I guarantee you if you stick with it you’ll walk away with some amazing skills, AND, if nothing else, you’ll have the experience it takes to go from knowing nothing at all about a subject to having some sort of mastery.
That’s something that you can take with you no matter what direction you chose to go.
I’m cheering you on in the meantime!

Comments